Not every email, task, or action needs to run in your Zap. That’s where filters come in.
Filters act like checkpoints inside your automations. They look at the data coming in and decide whether your Zap should keep running or stop right there. This saves you time, keeps your apps cleaner, and makes sure only the right stuff gets through.
In this post, we’ll break down what Filter by Zapier is, how to add a filter step, what the filter tool actually does, and what “filtered” means when you see it in your Zap history. By the end, you’ll know exactly how to use filters to make your automations smarter, faster, and way more useful.
What is Filter by Zapier?
Filter by Zapier is a tool that helps you control when your automations run. Before your Zap moves forward, the filter looks at the incoming data and decides if it meets the rules you set. If it passes, the Zap continues. If it doesn’t, the Zap stops right there.
So, what is Filter by Zapier in plain English? It’s a way to make sure your Zaps only run when the right conditions are met. Without filters, every trigger would fire and create actions you may not need. That can lead to messy data, wasted tasks, and even notifications you don’t care about.
Here’s an easy example. Let’s say you have a Zap that sends you a Slack message every time a new email arrives. That’s useful, but you don’t want to get pinged for every single email. Instead, you set up a filter: only send a message if the subject line contains the word “invoice.” Now, the filter acts like a doorman. It checks the subject line, and only the emails with “invoice” make it past the rope and into Slack. Everything else gets turned away at the door.
Filters are all about control. They help you build smarter workflows that focus on the data that matters most to you. Filters keep your automations lean and efficient.
How Do I Add a Filter Step in Zapier?
Adding a filter step in Zapier is simple. You just need to tell Zapier when a Zap should keep going and when it should stop. Here’s how to do it:
- Start with your trigger. Build your Zap as usual by picking a trigger app. This is the event that kicks everything off, like “new email in Gmail.”
- Click the plus sign. After your trigger, hit the small plus button to add another step.
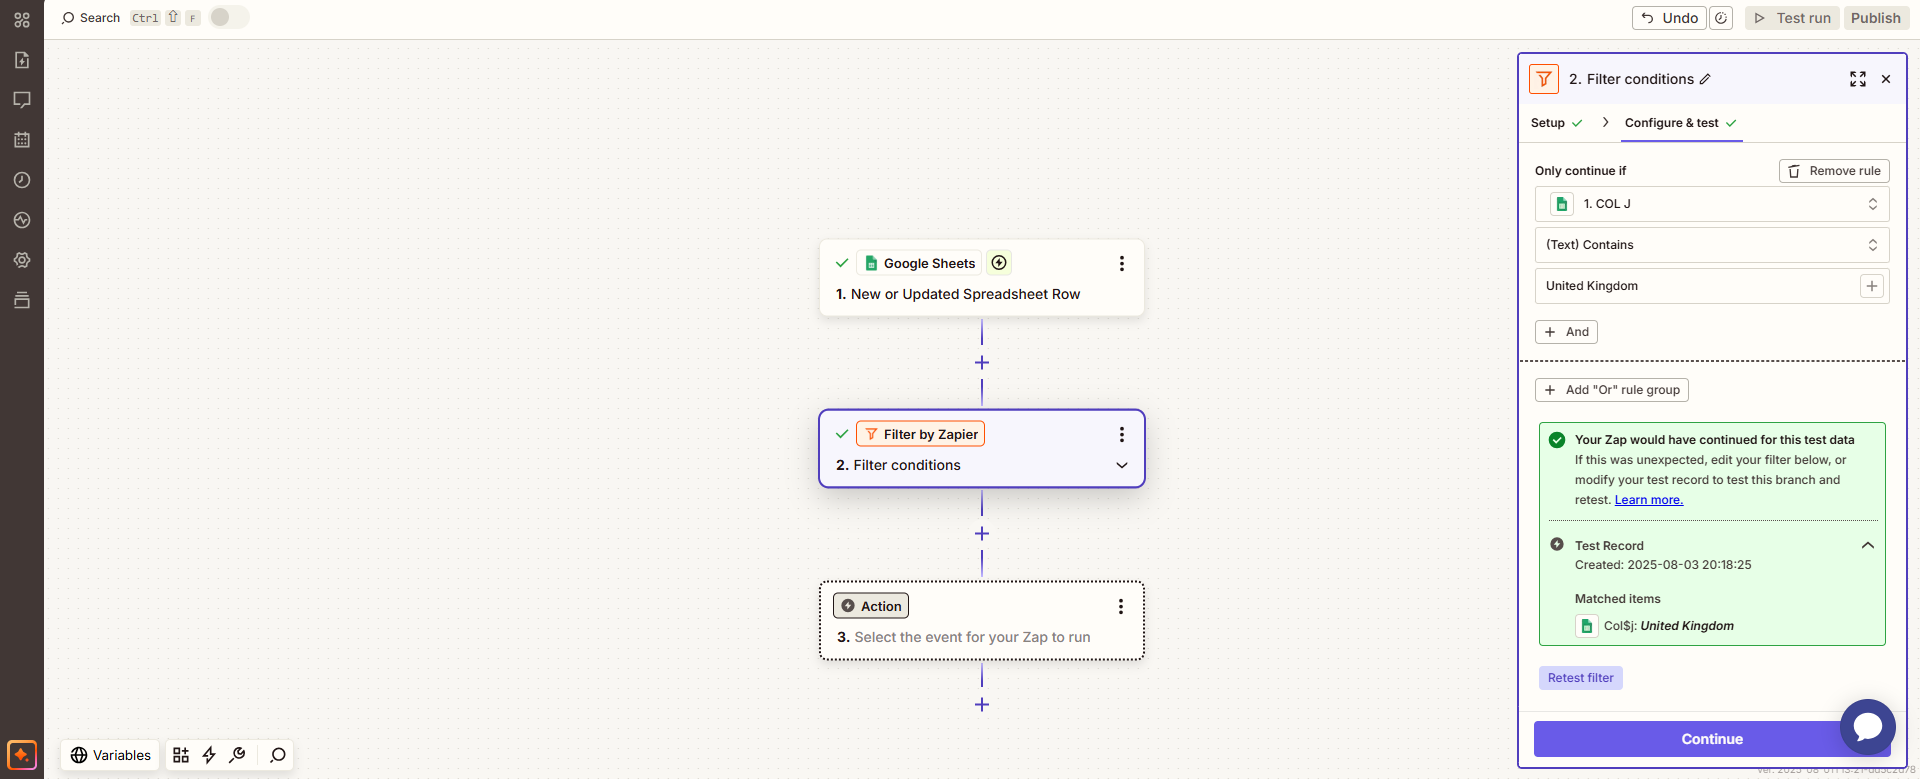
- Choose “Filter by Zapier”. From the options, select the Filter tool. This is where you’ll set your rules.
- Set your condition. This is the fun part. Zapier will show you fields from your trigger, like subject lines, form responses, or names. You decide what must be true for the Zap to continue. For example: “Only continue if the subject line contains ‘invoice.’”
- Test your filter. Zapier lets you run a quick test with sample data. If the condition is met, the Zap will continue. If not, it will stop at the filter.
- Add your actions. Once your filter is in place, you can add the steps you actually want to run, like sending a Slack message, updating a spreadsheet, or creating a task.
What Does the Filter Tool Do?
So, what does the filter tool do in Zapier? In short, it checks your rules before the Zap continues. If the data matches the conditions you set, the Zap runs. If it doesn’t, the Zap stops right there.
Think of it like a security guard for your workflow. It stands at the door, looks at the incoming data, and says, “Yes, you can pass” or “Nope, you’re not on the list.”
Here are a few real-life ways people use it:
- Invoices only. You get dozens of emails every day, but you only want an alert when an email has “invoice” in the subject, you can even say subject or body.
- Form responses. Let’s say you run a signup form. You only want to add contacts to your CRM if they answered “Yes” to a specific question. The filter blocks anyone who doesn’t qualify.
- Leads by quality. Maybe you only want to send high-value leads to your sales team. You can set a filter to pass through leads with a budget above a certain number.
Without the filter tool, every trigger would fire, and you’d end up with way too much noise. With it, you get clean, targeted automations that only act when it matters.
The filter tool is simple, but it’s one of the most powerful ways to keep your Zaps efficient and focused.
What Does “Filtered” Mean in Zapier?
If you’ve ever looked at your Zap history and seen the word “Filtered,” you might wonder what that means. So, what does filtered mean in Zapier? It’s simple: the conditions you set in your filter weren’t met, so the Zap stopped.
When this happens, the Zap doesn’t run any of the steps that come after the filter. It’s not an error, it’s just Zapier doing its job. The filter checked your rules, saw that the data didn’t match, and kept things from moving forward.
You’ll see this in your task history with a small filter icon and the “Filtered” label. That’s Zapier’s way of showing you the checkpoint worked as expected.
This status is actually a good sign. It means your filter saved you from running actions you didn’t want. No wasted tasks, no extra noise, just clean, intentional automation.
When you see “Filtered” in your history, it’s not a problem. It’s confirmation that your Zap ran exactly the way you set it up.
15 Common Use Cases for Filters
Here are ten simple ways to use them:
- Filter out spam leads. Only send leads to your CRM if they filled out all required fields.
- New order alerts. Get a Slack notification only when an email subject includes “new order.”
- Customer feedback. Only log survey responses in your “Happy Customers” sheet if the rating is 4 stars or higher.
- High-value deals. Pass leads to your sales team only if the budget field is above $5,000.
- Survey results. Only add responses to a spreadsheet if someone answered “Yes” to a key question.
- Priority tasks. Push tasks into Trello only if they’re tagged “Urgent.”
- Job applications. Forward resumes to HR only if the applicant selected “Full-time” on the form.
- Email sorting. Forward emails to your team only if they come from a specific domain (like @client.com).
- Support tickets. Create a Zendesk ticket only if the incoming message contains the word “urgent.”
- E-commerce orders. Trigger special workflows only for orders over a certain dollar amount.
- Lead qualification. Add new contacts to HubSpot only if they included a phone number.
- Content publishing. Post new blog content to social media only if the tag contains “Ready to be Published.”
- Job boards. Share applications with a hiring manager only if the applicant chose the correct job role.
- Expense tracking. Add purchases to your accounting software only if the amount is above $50.
- E-commerce alerts. Notify the warehouse only if the order contains a certain product SKU.
Filters vs. Paths: When to Use Each
Filters and Paths both help you control what happens in your Zap, but they work in different ways.
- Filters = one condition. They’re great when you only need a simple yes-or-no check. Example: “Only continue if the email subject contains ‘invoice.’” If the rule matches, the Zap runs. If not, it stops.
- Paths = multiple rules branching off. They’re perfect when you need different outcomes based on different conditions. Example: “If the lead’s budget is above $5,000, send it to the sales manager. If it’s below $5,000, send it to the general sales queue.”
Here’s the shortcut:
- One rule? Use a filter.
- Two or more rules? Use paths.
Paths let you design more complex workflows without creating a dozen separate Zaps. Check out my blog post on Paths by Zapier for a step-by-step guide.
Wrap Up
Instead of letting every trigger run wild, you control what passes through with Filter by Zapier. That means fewer distractions, less wasted effort, and workflows that actually work the way you want them to.
If you haven’t tried filters yet, now’s the time. Add one to a Zap today and see how much smoother your automations become.
And if you’re ready to take automation even further, I can help. I specialize in building streamlined, custom Zapier workflows that save businesses time and money.
👉 Reach out today let me design the perfect automation setup for you.