Learn how Delay by Zapier pauses your workflows, schedules actions, and controls timing without using extra tasks. Simple step-by-step guide.
What is the Delay in Zapier?
Most of the time, Zapier runs your Zaps as soon as they’re triggered. If a form is filled out, a file is uploaded, or it sends an email, the connected action happens right away. In some cases, like when using certain polling triggers, Zapier checks for new data every few minutes. But even then, once the trigger fires, it moves on to the next step without waiting.
That’s where Delay by Zapier comes in. Delay by Zapier lets you pause a Zap between steps.
It can be a short pause, like a few minutes, or a long one, like days or weeks. During this pause, nothing else in that Zap moves forward. It’s like pressing a pause button on a playlist; the song stops, but it’s still queued up and ready to play.
One key point: a delay step doesn’t use up extra tasksand that’s because Zapier counts tasks when actions happen, not when you’re waiting. So if your Zap sends an email after a 2-day delay, you’re only charged for the email step, not the two days of waiting.
Delays are useful in many cases:
- Waiting a day before sending a thank-you email
- Pausing until after an appointment to send follow-up notes
In short, Delay by Zapier gives you control over timing. You decide when each step happens instead of letting everything run instantly.
Why You Might Use a Delay
Delays in Zapier are more than just a timer. They give you control over the flow of your automations so things happen at the right moment, not all at once.
- One common reason to use a delay is to avoid overwhelming someone with messages. If your Zap triggers an email every time someone interacts with your business, those messages can pile up fast. A short delay lets you bundle communication or send it at a calmer pace, so your audience stays engaged without feeling spammed.
- Another smart use is waiting until after an appointment before sending a follow-up. For example, a Zap might create a reminder email right after a meeting is scheduled. But instead of sending it right away, you can delay it until the appointment has finished. This ensures the message is timely and relevant, like a thank-you note or a recap of what was discussed.
- And sometimes, a delay is just about giving people breathing room before the next step unfolds. If someone fills out a form to join an event, a short pause before sending detailed instructions can give them time to prepare. It makes the process feel natural instead of rushed.
You can also use Delay by Zapier to schedule actions for a specific time in the future. For example, if you want a reminder to go out exactly one week after a certain step, you can set the delay to wait that long before continuing. This is handy for follow-ups, recurring check-ins, or any action that needs precise timing after an event.
It’s worth noting that Zapier has another tool called Schedule by Zapier. The key difference is in how they work:
- Delay by Zapier is used inside a Zap, between steps, to pause the workflow before moving forward.
- Schedule by Zapier can only be used as a trigger. It starts a Zap at a set time or on a repeating schedule, but it can’t pause a Zap that’s already running.
Think of it like this: Schedule by Zapier sets the alarm clock to start your Zap, while Delay by Zapier hits the pause button once your Zap is already in motion.
In all these cases, Delay by Zapier turns rigid automation into a well-timed sequence. You stay in control, and the people on the other end get a smoother, better-paced experience.
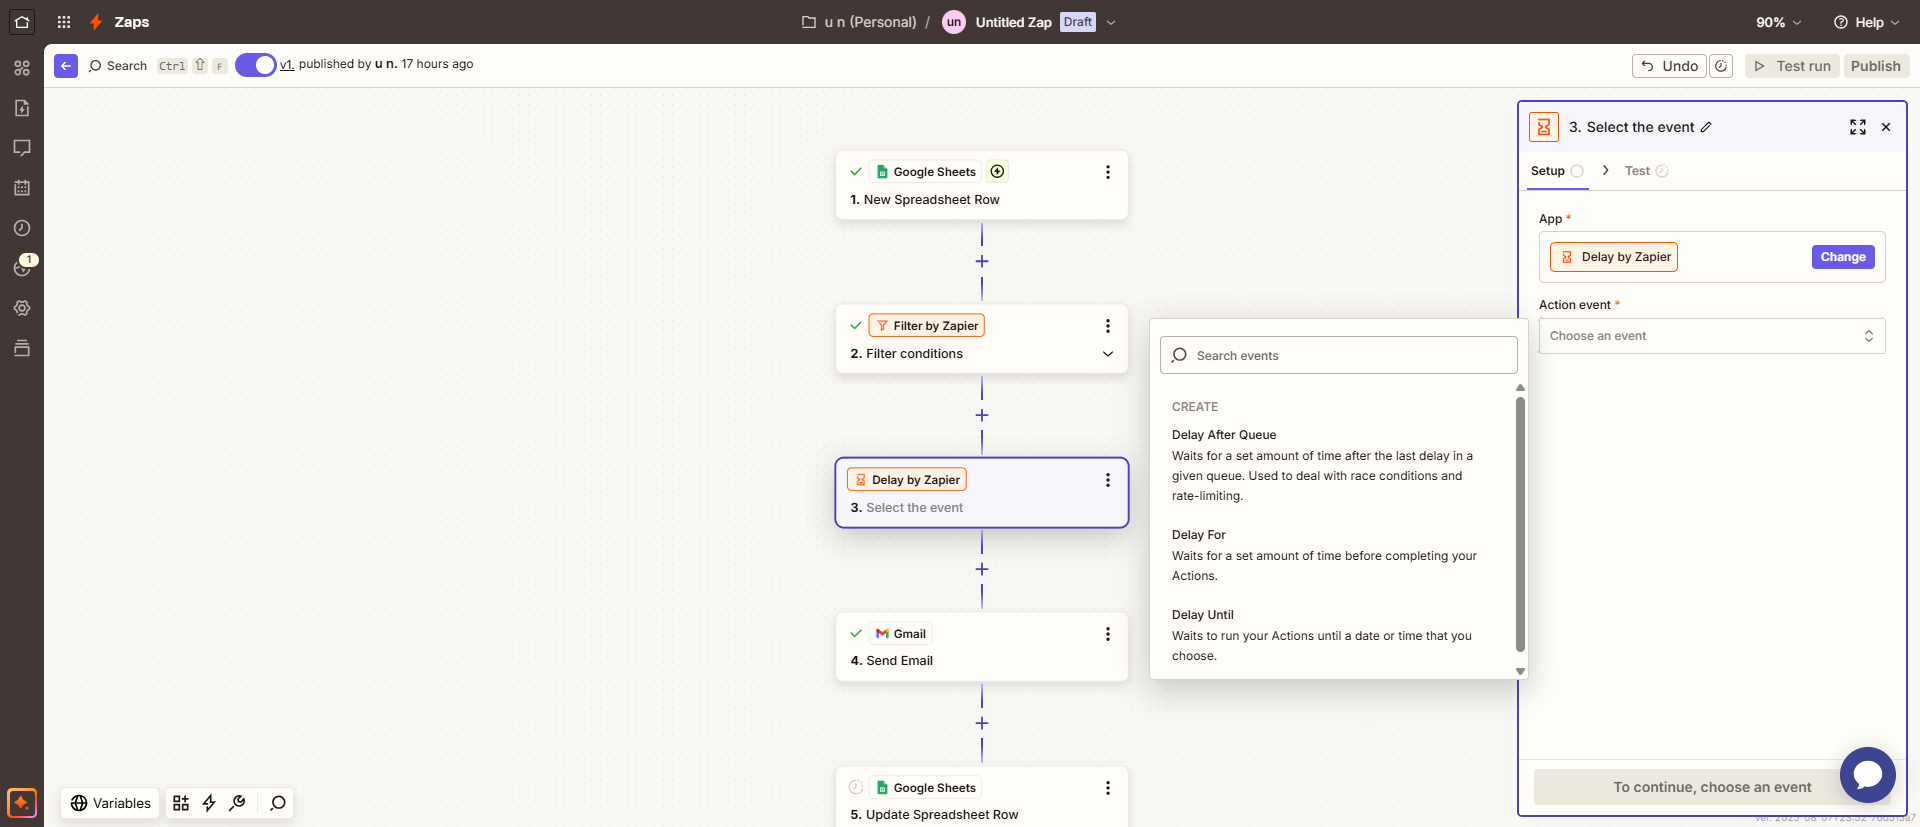
Three Delay Types You Can Use in Delay by Zapier
Delay by Zapier offers three ways to control timing inside your Zaps. Each one works a little differently, so you can pick the one that fits your workflow best.
- Delay For
This type waits for a set amount of time before moving to the next step. You decide how long (minutes, hours, days, or weeks). For example, if you want to send a follow-up email 3 days after someone fills out a form, set a “Delay For” of 3 days. - Delay Until
It waits until a specific date and time before continuing. Instead of saying “wait 2 days,” you tell Zapier, “run this at 3:00 PM on August 15.” It’s useful for fixed schedules, like sending a reminder the morning of an event or triggering a report at the end of the month. You can’t set a Delay Until for more than 30 days ahead. If you only enter a time (without a date) and that time has already passed today, the task will move forward right away. - Delay After Queue
“Delay After Queue” waits for a set amount of time after the last delay in a specific queue before running the next task. Sometimes multiple tasks try to run at the same time, which can cause race conditions or hit an app’s rate limits. This delay type makes sure only one task in the queue runs at a time, with the pause you set in between.
How to Add a Delay in Your Zap
- Create a zap and add your trigger
- Add an action step where you want the pause
- Select “Delay” from the app list.
- Pick your action event depending on how you want the timing to work. Click continue.
- Enter the timing details
- Select continue and test the step to confirm the delay works as expected.
- Add the next actions in your workflow.
Once you’re happy with it, hit publish to start running with the delay in place.
Key Takeaways
- Delay by Zapier gives you control over when each step in your workflow runs.
- You can pause for a set time, wait until a specific date/time, or manage tasks in a queue.
- Delays don’t use extra tasks; they just hold the workflow until it’s time to move on.
- They’re useful for pacing messages, spacing out data sends, and creating smoother experiences.
- “Schedule by Zapier” starts workflows, but “Delay by Zapier” pauses them mid-flow.
Need help building better workflows in Zapier or Make.com? Reach out and I’ll help you design, optimize, and fine-tune your automations so they run exactly how and when you want.