If you’re using Zapier to automate your tasks, there’s a feature that takes things up a level: Paths by Zapier. Think of it like giving your Zap a brain. Instead of doing just one thing every time, it can decide what to do based on the details it sees.
Here’s what that means:
- Paths let your Zap choose between different actions. For example, if someone selects “Yes” on a form, you send them one email. If they choose “No”, you send a different one.
- You don’t need to build multiple Zaps for every scenario. Paths keep your automation clean, organized, and smart.
In short, if you want your automation to do the right thing at the right time, Paths by Zapier is how you get there.
What Are Paths by Zapier?
Paths by Zapier let your automation make choices based on the data it receives. Instead of running the same steps every time, your Zap checks the incoming data and branches off in different directions. Each branch, called a Path, has its own set of steps and rules.
Think of it like this:
- You’re building one Zap.
- But inside that Zap, you want it to behave differently depending on what’s coming in.
- With Paths, you can tell your Zap:
“If this happens, do A. But if that happens, do B.”
It’s like giving your workflow decision-making power.
Example:
Let’s say your trigger is “New Email in Gmail.” Here’s what your Paths could look like:
- Path A: If the email subject contains the word “urgent,” then:
- Send a Slack message to your team.
- Update your CRM’s priority.
- Send a Slack message to your team.
- Path B: If the email doesn’t contain “urgent,” then:
- Save the email to a spreadsheet.
- Send a thank-you message.
- Save the email to a spreadsheet.
So instead of making two different Zaps, Paths lets you build both responses inside one Zap.
How Are Paths Different from Filters?
- Filter by Zapier stops a Zap from running if a condition isn’t met.
Example: You have an online store. You only want to send a Slack message when an order total is more than $200.
With a Filter, you set a condition: Order total > 200. This means if true → Send Slack message and if false → Do nothing. The Zap ends.
So, Filters are yes/no gates.
- Paths take it further. It’s like a fork in the road. The Zap looks at the data and chooses between multiple outcomes based on your rules.
Example: Same online store. Now, you want to handle different order sizes differently:
- If order total > $500 → Notify Sales Manager
- If order is between $200–$500 → Notify Support Team
- If order is below $200 → Add the customer to a “low spenders” segment for future campaigns
Here, you use Paths because there are multiple directions your Zap can go.
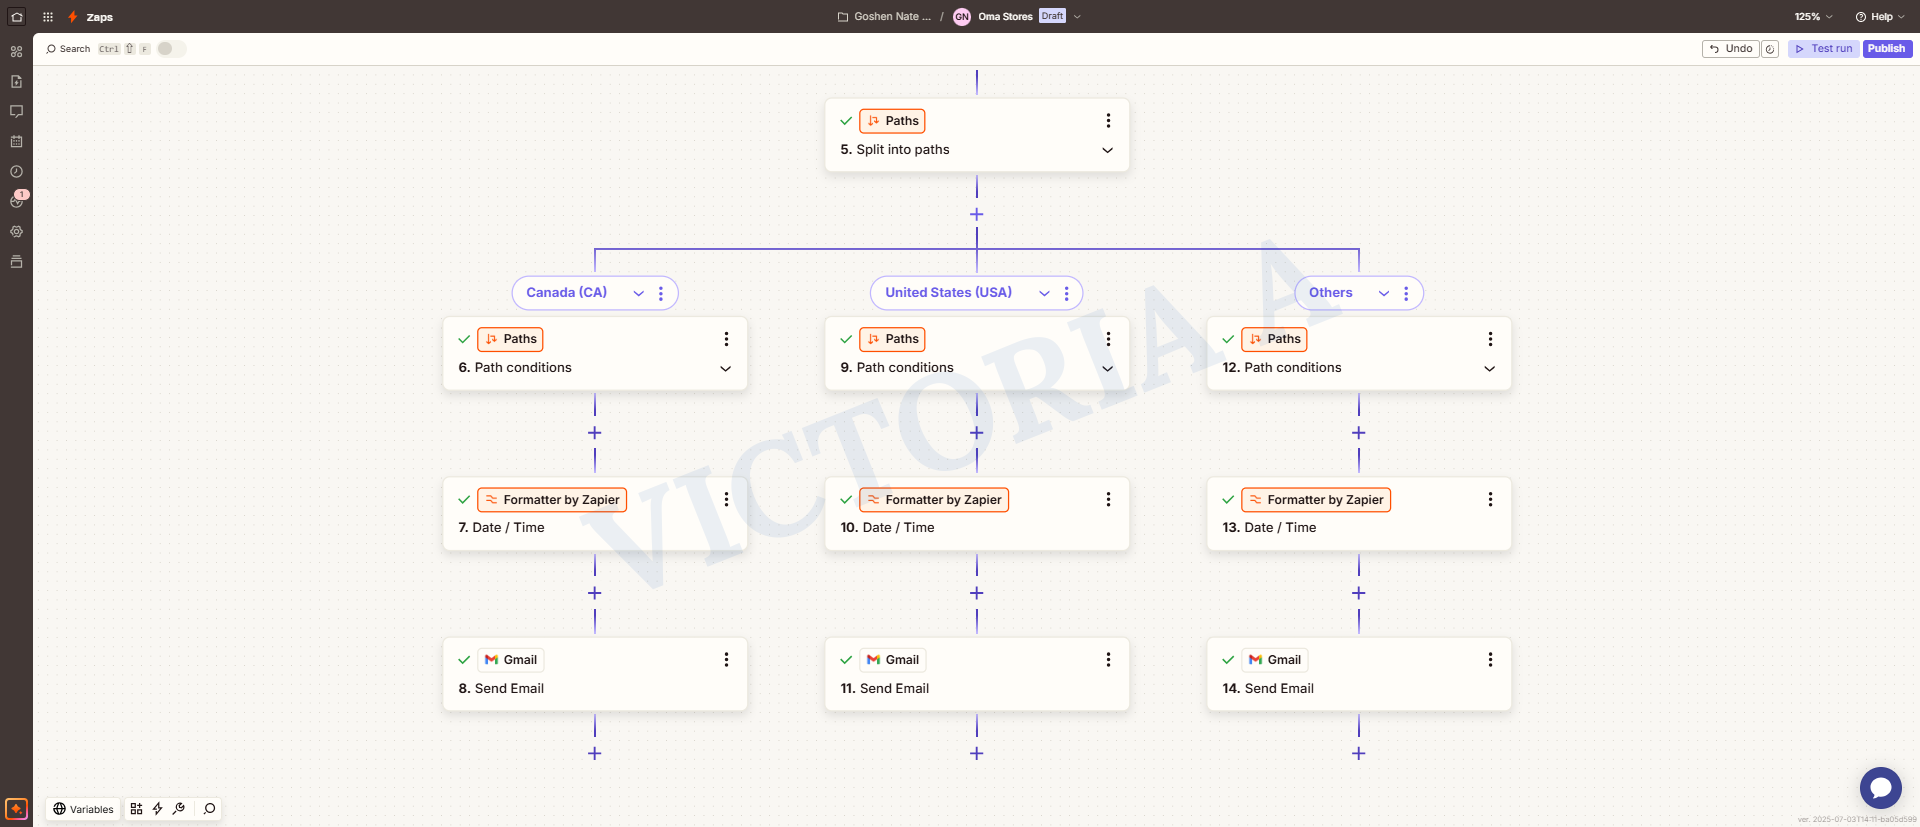
How to Add Branching Logic with Paths in a Zap:
Here’s how to do it step-by-step:
- Start your Zap with a trigger. For example, “New or Updated Spreadsheet Row.”
- Click + and choose Paths by Zapier.
- You’ll see Path A and Path B.
- Need more paths?
- Click on the + between Split into paths and Path conditions.
- Click each to set conditions.
- Add rules in Path conditions.
- Add the steps you want Zapier to take for that condition in “Action”.
- Add rules in Path conditions.

Each path runs only if its conditions match the incoming data. If none match, the Zap stops, unless you create a fallback path.
Use “AND”/”OR” Logic to Control Flow:
Zapier lets you group conditions using logic:
- AND logic: All conditions must be true.
- OR logic: Only one condition must be true.
You can mix AND and OR in one path, but you’ll need to group them carefully. Just pay attention to how your logic is structured.
Tips and Good Practices for Using Paths in Zapier
If you’re using Paths by Zapier, it’s important to keep things clean and reliable. Here are simple tips to take note of.
1. Name Your Paths Clearly
Don’t leave them as “Path A,” “Path B,” etc. Instead, use labels that describe what each path does:
- ✅ Good: “New Client Signup”
- ✅ Better: “Order Over $500” or “Free Plan User”
- ❌ Avoid: “Path C”
Clear names help you understand the logic at a glance, especially when you come back weeks or months later.
2. Always Test Each Path
Use test data that matches each condition. If one path handles VIP customers, test it with a fake VIP order. If another handles free users, send through a test that matches that group.
This helps catch errors before they happen live.
Common Mistakes to Avoid
Even though Paths by Zapier is powerful, it’s easy to mess things up if you’re not careful. Here are common mistakes that can break your Zap.
Skipping Tests
Don’t assume your paths will work just because they look right.
- Always test each path with sample data that matches the rules.
- If a path handles “New Customers,” test it with a “New Customer” form.
- Otherwise, you might miss errors or logic gaps.
Testing isn’t optional; it’s how you catch problems early.
Mis‑grouping “AND” / “OR” Logic
Zapier lets you set multiple rules in each path. But if you group them the wrong way, the logic breaks.
Whether you’re sending different emails based on user choices, routing tasks to the right team, or skipping steps that don’t apply, Paths help you do all of that in one Zap.
Try it out today:
Open one of your Zaps, add a Path, and set up two different outcomes.
Need help building or fixing your automation?
👉 I can help you set up clean, efficient, and logic-based Zaps. Contact me, let’s discuss your project!